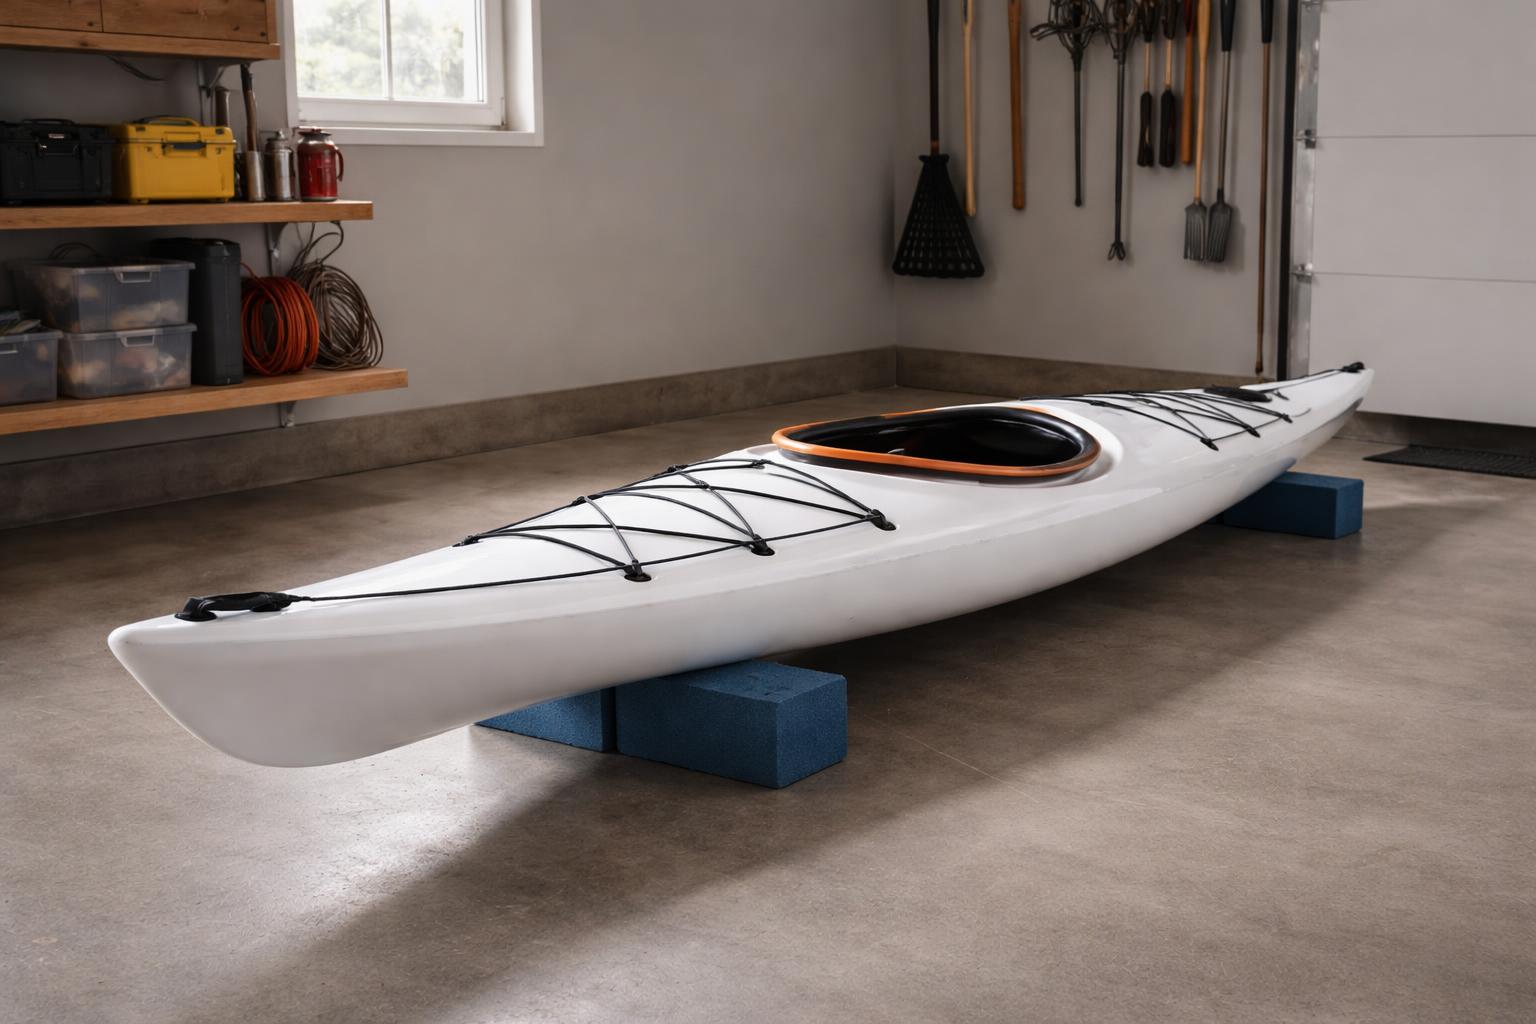
The key is to keep your kayak clean and completely dry, support the hull properly, and protect it from moisture, freezing conditions, and UV exposure. Poor storage can lead to hull deformation, scratches, trapped moisture, or other damage by the time spring arrives.
Whether you have a garage, shed, limited indoor space, or need to keep your kayak outdoors, you can protect it with the right setup. In this guide, I’ll show you how to store a kayak in winter using 7 practical steps, from cleaning and drying your kayak to choosing the right support position, covering it properly, and checking it throughout the season.
I’ve stored kayaks through eight winters and learned several of these lessons the hard way. That experience has taught me that good winter storage isn’t about buying expensive equipment it’s about avoiding a few common mistakes and giving your kayak the right protection while it sits unused.
👉 Ready to make the leap? Learn how to choose your first kayak and find a great starter boat today.
Quick Answer
To store a kayak for winter: (1) clean it, (2) dry it completely inside and out, (3) remove all hardware and accessories, (4) support it on a rack or cradles never flat on a hard surface, (5) keep it off the ground, (6) cover it if it’s outdoors, and (7) check on it every few weeks. Indoor storage is always safer than outdoor, but outdoor storage works fine if you follow these steps.
At-a-Glance: Winter Storage Summary
| Factor | Indoor Storage | Outdoor Storage |
|---|---|---|
| UV protection | Excellent | Needs a UV-resistant cover |
| Temperature swings | Minimal | Significant freeze-thaw risk |
| Best position | Horizontal on padded racks | Horizontal, elevated, covered |
| Check-in frequency | Every 4–6 weeks | Every 2–4 weeks |
| Typical cost | Free (if space exists) | Rack and cover, cost varies by brand |
| Risk level | Low | Moderate, manageable with prep |
👉 Curious what is a fishing kayak and if it’s right for you? Compare our top fishing kayak picks to find out.
Indoor Storage vs. Outdoor Storage: The Short Version
Indoor storage a garage, shed, or basement is the safer default whenever you have the space, since it removes most of the UV, temperature, and moisture variables at once. Outdoor storage is a completely workable second option, but it shifts more of the responsibility onto you: a good rack, a real cover, and periodic check-ins do most of the work that four walls would otherwise handle automatically.
Why Proper Kayak Storage Matters
The first time I stored a kayak for winter, I leaned it against the shed wall and forgot about it until spring. The hull had a visible warp along one side a direct result of resting all its weight on a single narrow contact point for four months. That one mistake taught me more about hull integrity than any manual could.
Here’s what’s actually happening to an unprotected kayak out in the elements: UV radiation breaks down the polymer chains in plastic hulls, making them brittle and prone to cracking over time. Sustained pressure on one spot a wall, a hook, an uneven floor can let the material slowly deform into that shape and stay there. And any water trapped inside the hull will freeze and expand, which can stress or crack the material around it. None of this happens overnight, which is exactly why leaving a kayak outside in the winter without any prep is so easy to regret by spring.
The fix isn’t complicated. It just has to be done in the right order.
👉 Trying to decide between a sit-on-top vs sit-in kayak? Our comparison guide covers the pros and cons of each.
Best Storage Method: Quick Decision Box
Not sure which setup fits your situation? Use this as a starting point, then check your owner’s manual for anything specific to your model:
| Your situation | Recommended approach |
|---|---|
| Have garage/shed space | Indoor, horizontal, on a padded rack |
| Limited floor space, but indoors | Indoor, vertical or wall-mounted, with padding at every contact point |
| No indoor space at all | Outdoor, horizontal, elevated, fully covered, in a sheltered spot (under an eave, out of prevailing wind) |
| Multiple kayaks, tight space | Indoor, ceiling hoist or stacked wall rack system |
| Inflatable kayak | Indoors, deflated, in a breathable storage bag regardless of space constraints |
The 7-Step Winter Storage Process
Step 1: Clean the Kayak Thoroughly
Rinse off dirt, sand, and algae with fresh water, then use a mild soap and a soft brush on stubborn spots. Pay attention to the cockpit, hatches, and any crevices around fittings. If you paddle in saltwater, this step isn’t optional salt residue can accelerate corrosion on metal hardware and degrade UV coatings over time.
Step 2: Dry It Completely
This is the step most people rush, and it’s the one most likely to cause winter damage. Tip the kayak on its side, then upside down, to drain every pocket of water hatches, the cockpit, under deck rigging, all of it. Wipe accessible surfaces with a towel, then leave it in a ventilated space until it’s completely dry this may take several days before sealing it up for storage. Any water left behind can freeze and expand, potentially cracking the material around it, or simply sit and grow mildew.
Step 3: Remove Hardware and Accessories
Take off seats, foot braces, rudders, rod holders, and anything electronic. Store small parts in labeled bags. This protects fabric and metal components from the cold and makes reassembly in spring a five-minute job instead of a scavenger hunt.
Step 4: Choose the Right Support Position
Horizontal storage on a rack, sawhorses, or padded cradles is generally considered the safer option for long-term storage it spreads weight more evenly and reduces pressure points. Vertical storage saves floor space but concentrates weight on one end; it can work well if you pad the contact points and check periodically for any developing stress. Some paddlers prefer hanging the kayak from the ceiling using wide slings positioned near the bulkheads, which suspends the kayak without any single point bearing all the load just avoid narrow rope or cord that can dig into the hull.
What’s worth avoiding is resting the hull flat on a hard, unsupported surface or leaning it unpadded against a wall for months at a time both have been linked to the kind of warping and gel coat cracking I’ve dealt with personally.
Step 5: Keep It Off the Ground
Ground contact traps moisture, invites pests, and transmits cold directly into the hull. Elevate the kayak on a rack, sawhorses, or wall mount even a few inches of clearance makes a meaningful difference for air circulation and moisture control.
Step 6: Cover It (Especially Outdoors)
A breathable, UV-resistant cover is close to essential if you’re storing outside. I once used a cheap tarp instead of a real kayak cover it trapped condensation, and the kayak’s color faded noticeably within a single season. A proper cover should fit snugly without being airtight, so moisture can still escape.
Step 7: Check In Periodically
Outdoor storage needs a check every 2–4 weeks: clear snow buildup, confirm the cover is still secured, and look for pest activity. Indoor storage is lower-maintenance once every 4–6 weeks is usually enough to catch any issues early.
👉 Still wondering what size kayak do I need? Our sizing guide breaks it down by height, weight, and paddling style.
How to Store a Kayak in the Garage or Shed
For most paddlers, the garage or shed is where winter kayak storage actually happens it’s dry, shielded from the worst weather, and usually already has wall or ceiling space to work with. A few things make a real difference here:
- Measure your space in your garage before buying a rack a kayak in the garage needs both length clearance and enough width to walk around it safely
- Use wall-mounted racks to keep the floor clear for a car or other gear; these hold the kayak horizontally against the wall on padded arms
- Consider a ceiling hoist if floor and wall space are both tight this is one of the most space-efficient ways to store a kayak vertically overhead, out of the way entirely
- Keep it away from heat sources like a furnace or water heater, since sustained heat can soften plastic hulls over time
- If your garage or shed isn’t fully insulated, the temperature swings are similar to outdoor storage, so still plan for a cover and off-ground support
👉 New to paddling? See our top picks for kayaks for beginners and take the next step with confidence.
Vertical Storage and Hanging Methods
Beyond simply choosing “vertical vs. horizontal,” there are a few distinct ways to store a kayak vertically or suspend it that are worth knowing about:
- Wall-mounted vertical rack the kayak stands on end, secured by a strap or bracket near the top; works well in narrow spaces but requires padding at the base
- Ceiling slings two wide straps, one near each bulkhead, hang the kayak from the ceiling horizontally; this is gentle on the hull since weight is spread across two support points rather than one
- J-cradles or J-racks mount the kayak on its side at an angle, a setup several manufacturers recommend specifically because it keeps weight off the flattest (most easily deformed) part of the hull
Whichever method you choose, avoid anything that concentrates the kayak’s full weight onto a single narrow edge for months that’s the scenario most likely to leave a permanent dent or flex in the hull.
👉 Know your numbers? Read our full kayak weight capacity guide to make sure your pick can handle you and your gear.
Proper Storage Tips: Your Winter Storage Checklist
Print this or save it these storage tips cover steps 1 through 6 in order, and following them is the most reliable way to store a kayak properly for the whole winter:
- [ ] Rinse and scrub hull, cockpit, and hatches
- [ ] Flip and drain all trapped water
- [ ] Air dry until completely dry this may take several days
- [ ] Remove seat, rudder, foot braces, and electronics
- [ ] Store small hardware in labeled bags
- [ ] Choose horizontal storage where possible
- [ ] Pad every contact point on racks or walls
- [ ] Elevate the kayak off the ground
- [ ] Apply UV-resistant cover if storing outdoors
- [ ] Leave hatches slightly open for airflow (indoor storage)
- [ ] Set a reminder to check in every 2–6 weeks
What NOT to Do
A few mistakes show up over and over in kayak forums and in my own storage history:
- Don’t rest the hull flat on concrete, dirt, or a hard uneven surface for months at a time
- Don’t use a generic plastic tarp as a substitute for a breathable kayak cover it traps condensation instead of blocking it
- Don’t store it with water still inside the hull or hatches
- Don’t hang a kayak by the grab handles or drain plugs alone for long-term storage they’re generally designed for carrying and quick lifts, not sustained weight over months
- Don’t stack heavy items on top of a stored kayak
- Don’t ignore the manufacturer’s storage guidance in your owner’s manual some brands specify exact support points
👉 Ready to buy? Browse our roundup of the best kayaks under $500 and find a great option without breaking the bank.
Kayak Storage Advice by Material Type
Polyethylene (plastic) kayaks tend to be the most forgiving material overall many paddlers store poly boats in unheated spaces through freezing winters without issue, since the plastic itself is fairly cold-tolerant. The bigger risks are UV exposure over time and sustained pressure that can let the plastic “creep” into a deformed shape. Support the hull evenly and keep it shaded, and check your specific manufacturer’s guidance since formulations vary by brand.
Fiberglass and composite kayaks are more rigid and won’t sag under their own weight the way plastic can, but they’re vulnerable to impact cracks and gel coat “spider cracking” from rapid temperature swings. Pad every contact point carefully I learned this after finding hairline cracks where an unpadded rack had pressed against the hull all winter.
Inflatable kayaks need a different approach entirely: clean, dry completely (mold is the main enemy here), deflate fully without tight folds, and store loosely rolled in a breathable bag indoors, away from rodents that see deflated fabric as nesting material.
Best Kayak Storage Solutions for Long-Term Storage
There’s no single best kayak storage setup that fits everyone the right answer depends on your space, how many kayaks you own, and how often you paddle in the off-season. That said, a few storage solutions consistently come up as the most effective ways to store a kayak long-term:
- Freestanding padded racks the simplest option for one or two kayaks, and easy to move if you rearrange your garage
- Wall-mounted horizontal racks good when floor space is limited but wall space isn’t
- Ceiling hoists or pulley systems the most space-efficient solution for anyone storing a kayak in a small garage alongside a car
- Kayak trees or stacked racks worth it for a genuine kayak enthusiast with a quiver of two or more boats
Whatever you choose, the goal is the same: distribute the kayak’s weight evenly across the cradles, keep it off the ground, and give it enough clearance that nothing else in the space is resting against the hull.
👉 Found a favorite? Check our list of the best recreational kayaks to make sure you’re picking the right one for how you’ll paddle.
How to Protect Your Kayak from UV, Dents, and Other Winter Damage
Beyond the core 7 steps, a few extra habits go a long way toward keeping your kayak dry, undamaged, and in top shape by spring:
- Shield your kayak from direct sun even in winter UV exposure doesn’t stop just because it’s cold out
- Check periodically for dents or soft spots that can develop where the kayak rests against a rack, especially early in the season before the material fully settles into its support
- Turn your kayak occasionally if it’s resting on one side for an extended period, to avoid any single point bearing the load for the entire winter
- Keep the storage area dry a damp garage or shed defeats the purpose of drying your kayak thoroughly beforehand
- Applying a UV protectant isn’t just a spring task a light reapplication partway through winter can help protect your kayak during unusually sunny stretches
What to Look for in a Kayak Storage Rack
Not all racks are created equal, and the wrong one can cause the exact damage you’re trying to prevent. When shopping for one, look for:
- Padded, contoured cradles foam or rubber padding that conforms to the hull shape, not bare metal or wood
- Support at the right points ideally near the bulkheads, not concentrated at the very center or ends of the hull
- Weight rating that comfortably exceeds your kayak’s weight check the rack’s stated capacity against your kayak’s actual loaded weight
- Material suited to your environment powder-coated or galvanized steel for outdoor/garage use to resist rust and moisture
- Adjustable width or arm spacing useful if you paddle more than one kayak or plan to upgrade
- Stable footing or secure wall/ceiling mounting a rack that wobbles or isn’t anchored properly can shift and stress the hull over time
If you’re storing outdoors, prioritize racks explicitly rated for outdoor/UV exposure some indoor-only racks will degrade faster than expected when left outside.
👉 Now that you know how much does a kayak cost, see our picks for the best kayaks under $500 to get the most for your money.
Outdoor Security Considerations
If your kayak will sit outside all winter, theft and weather-related displacement are both worth planning for:
- Cable-lock or chain it to a fixed structure (rack, post, or anchor point) using a lock rated for outdoor/marine use
- Choose a less visible location where possible away from the street or property line
- Secure loose items like paddles, PFDs, and seats indoors separately, since these smaller items are more commonly taken than the kayak itself
- Anchor lightweight kayaks (especially inflatables and short recreational boats) against wind strong gusts can shift or topple an unsecured kayak off a rack
- Consider motion-sensor lighting near the storage area if it’s in a yard or driveway
Pre-Storage Inspection Checklist
Before you put the kayak away, take ten minutes to inspect it small issues are far easier to fix now than to discover as bigger problems in spring:
- [ ] Check the hull for cracks, gouges, or soft spots
- [ ] Inspect seams (especially on inflatables) for separation
- [ ] Test the rudder and skeg cables for smooth movement
- [ ] Look for corrosion on metal fittings and hardware
- [ ] Check hatch covers and bulkhead seals for cracking
- [ ] Note any repairs needed so you can order parts over winter, not in a rush come spring
👉 Ready to build out your setup? Explore our complete kayak fishing rigging guide to finish your build.
Getting Your Kayak Ready for Spring
Winter storage isn’t really finished until you’ve done a proper spring check before the first paddle:
- Inspect first. Look over the hull, seams, and hardware for anything that changed while it was stored this is your second chance to catch what the pre-storage inspection might have missed.
- Reattach hardware. Put the seat, foot braces, and rudder back on, checking that cables move freely after months of sitting.
- Clean off storage residue. Dust, cover fibers, or a light layer of mildew (if drying wasn’t perfect) should be washed off before the first launch.
- Test in shallow water first. Before a full trip, a short test paddle near shore confirms everything hatches, rudder, seams is sealed and functioning properly.
- Reapply UV protectant. A fresh coat of a 303-type UV protectant at the start of the season adds another layer of defense for the year ahead.
👉 Narrowed down your options? Compare our top picks for the best pedal kayaks for fishing before you check out.
Frequently Asked Questions
Can you store a kayak outside in winter?
Yes. Elevate it off the ground, support it horizontally, and use a breathable, UV-resistant cover. Outdoor storage is a reasonable second choice to indoor storage as long as those three conditions are met.
Is it bad to store a kayak on its side?
Not necessarily many manufacturers actually recommend side storage for certain hull designs, provided the contact points are padded and positioned near the bulkheads rather than the middle of the hull. What’s genuinely risky is resting it flat on a hard surface for months, which concentrates stress differently and can cause “oil canning” (a visible dimple or flex in the hull).
Does cold temperature itself damage a kayak?
Cold air alone tends to be less of a concern than what’s often assumed many paddlers store polyethylene kayaks in unheated garages that drop well below freezing without noticeable issues. The bigger risk is usually water trapped inside the hull, hatches, or fittings: when it freezes, it expands and can crack the material around it. Drying the kayak completely before storage addresses most of this risk, though tolerances can vary by material and manufacturer.
Will improper storage void my kayak’s warranty?
It depends entirely on your manufacturer’s specific terms, so check your owner’s manual or contact the manufacturer directly. Storage-related damage such as hull deformation from improper support, or fading and brittleness from prolonged UV exposure is often treated differently from manufacturing defects, but coverage varies significantly by brand and model. Following your manual’s storage recommendations is the safest way to protect any coverage you do have.
How to store inflatable kayaks in winter?
Clean it, dry it completely (this can take several days), deflate it fully without creating tight folds, and store it loosely rolled in a breathable bag indoors, away from extreme temperatures and rodents.
How often should I check on a stored kayak?
Every 2–4 weeks for outdoor storage, mainly to clear snow and confirm the cover is secure. Indoor storage needs less attention checking once every 4–6 weeks is usually sufficient.
What’s the best way to store a kayak long-term?
For long-term storage spanning multiple winter months, horizontal storage on padded racks indoors if at all possible is the setup that comes up most often among manufacturers and experienced paddlers alike. It distributes the kayak’s weight evenly, keeps it off the ground, and avoids the pressure points that cause most long-term storage damage.
How do I properly store a kayak in a garage with limited space?
If floor space in your garage is tight, a wall-mounted rack or ceiling hoist lets you store a kayak vertically or overhead without sacrificing room for a car or other gear. Just make sure contact points are padded, since space-saving setups often mean less surface area supporting the hull.
Conclusion: How to Store a Kayak in Winter Properly and Protect It All Winter
The goal is simple: keep your kayak clean, dry, properly supported, and protected from the conditions that can cause damage while it sits unused.
Before storing it, rinse and clean the kayak, let it dry completely, remove unnecessary accessories, and place it on properly padded supports. Keep it elevated, protect it from moisture and UV exposure, and check on it periodically during the winter. If you’re storing it outdoors, give it as much shelter as possible and use a breathable, UV-resistant cover.
And don’t overlook your manufacturer’s storage recommendations. Your kayak’s material and design can affect the safest way to support and protect it.
A few extra minutes of preparation now can save you from discovering a warped hull, damaged fittings, or an unpleasant repair bill when spring arrives. Your kayak has carried you across calm lakes, winding rivers, and countless memorable days on the water. It deserves a little care when the season is over.
So don’t just leave it wherever there’s space and hope for the best. Store it with the same care you give it on the water. When the snow and cold finally disappear, you’ll be able to uncover your kayak, load it up, and get back on the water instead of spending the first warm weekend fixing winter damage.