I’ve spent over 15 years kayak fishing from skinny redfish flats in under 2 feet of water to open-water reservoirs with real current and I’ve tested every method below across dozens of trips, including the ones that didn’t hold up as well as expected. This guide covers what actually works, what doesn’t, and how to use a kayak anchor system safely no matter where you fish.
Quick answer: how to anchor a kayak safely Use a folding grapnel anchor with an anchor trolley, and let out enough anchor rope to keep the anchor angle low (a common starting point is roughly 7 feet of line for every foot of water depth plus freeboard, though this varies with conditions more on that below). In shallow water under 5 feet, a stake-out pole is faster and quieter. In wind, a drift sock controls your drift instead of stopping it. Below, I’ll walk through all 5 methods, where to attach the anchor on your kayak, and the mistakes that cause most kayak anchoring problems and capsizes.
Which Method Should I Use to Anchor a Kayak? (Quick Reference)
| Situation | Best Method | Why |
|---|---|---|
| Shallow water (under 5 ft), soft bottom | Stake-out pole | Fast, silent, no anchor line needed |
| Mixed or unknown bottom, moderate depth | Grapnel anchor | Digs into mud, sand, or rock |
| Windy days, want to keep covering water | Drift sock | Slows drift instead of stopping it |
| Frequent repositioning in current or wind | Anchor trolley + grapnel | Lets you move the anchor point without re-anchoring |
| Calm water only, short stops | Bow/stern tie-off | Simple, but limited and less forgiving if conditions change |
Got your kayak loaded up now make sure it’s rigged right. See our fishing kayak rigging guide next.
What You Need to Anchor a Kayak Safely
Before you deploy anything, it helps to understand the core components of a kayak anchor system the anchor, the anchor rope, and (optionally) the trolley all work together, and skipping any one of them is usually where problems start.
Choosing an Anchor: The Two Types of Anchor You’ll Use Most
There are really two types of anchor most kayak anglers choose between, plus one non-anchor alternative:
- Folding grapnel anchor the most versatile type of anchor for kayak use. This anchor with four folding flukes digs into mud, sand, and rocky bottoms alike, and collapses flat for storage in a kayak’s limited hatch space.
- Mushroom anchor fine in calm water over soft mud, but it doesn’t have the holding power for real current or wind.
- Stake-out pole not a traditional anchor at all, but the fastest and quietest way to anchor a kayak in shallow water.
When choosing an anchor, match it to the bottom type and conditions you fish most, not the biggest or heaviest option on the shelf see the buying checklist further down for a full rundown.
Essential Anchor System Gear
- Anchor rope (anchor line) braided nylon is standard. It has enough give to absorb shock from waves without so much stretch that you lose your position. Some anglers add a short length of anchor and chain between the rope and the anchor itself for extra weight and abrasion resistance over rock.
- Cleat or anchor lock secures the anchor rope to the kayak.
- Quick-release point lets you release the anchor or cut the anchor line fast if conditions change. Don’t skip this.
- Anchor trolley kit (optional but recommended) a pulley system running the length of the kayak that lets you move the anchor trolley and with it, your anchor point without pulling and re-dropping the anchor.
Anchor Type Comparison by Bottom Type
| Anchor Type | Mud | Sand | Rock | Grass/Weed | Notes |
|---|---|---|---|---|---|
| Folding grapnel | Good | Good | Good | Fair | Best all-around choice for mixed or unknown bottoms |
| Mushroom | Good | Fair | Poor | Poor | Only suited to calm water and soft bottoms |
| Stake-out pole | Good | Good | Poor | Fair | Doesn’t penetrate hard or rocky bottoms |
| Drift sock (not a true anchor) | N/A | N/A | N/A | N/A | Controls drift; doesn’t hold a fixed position |
How to Anchor a Kayak: Step by Step
- Assess the water check the depth of the water, current speed, wind direction, and bottom type before you deploy the anchor.
- Approach from upstream or upwind this lets the anchor set naturally as you drift back, rather than fighting to reach your spot.
- Lower the anchor slowly don’t throw it overboard. A controlled drop helps the flukes set instead of skipping across the bottom.
- Let out more anchor line for a low angle see the scope section below. Insufficient line is the most common reason an anchor won’t hold.
- Secure the anchor rope through a quick-release point never a knot you can’t undo fast.
- Move the anchor trolley, if you have one slide the anchor point toward the bow of your kayak or the stern of your kayak depending on how wind and current are hitting the hull.
- Confirm you’re holding pick a fixed reference point on shore and watch it for 30 seconds to make sure the anchor isn’t dragging.
Ready to see what’s under your kayak? Compare more options in our best pedal kayaks for fishing guide.
Where to Attach the Anchor: Bow, Stern, or Side of Your Kayak
How and where you attach your anchor to your kayak matters as much as which anchor you use.
- Bow attachment tying the anchor at the bow of your kayak points the front of the boat toward the pull of the anchor. This works well when the kayak is already facing into current or wind, but a fixed point at the bow gives you no way to adjust if conditions shift.
- Stern attachment anchoring from the rear of your kayak is sometimes used in very calm water, but a low stern sitting into chop or waves can take on water more easily than a bow attachment.
- Side attachment via a trolley an anchor trolley lets you run the anchor line along the side of the kayak and stop it anywhere between the bow and stern, which is why many anglers eventually add one instead of choosing a single fixed point so your kayak sits at one angle permanently.
Whichever point you choose, use a secure point on your kayak rated for the load a proper cleat, trolley ring, or dedicated anchor attachment, not a seat strap or handle.
How to Anchor a Fishing Kayak in Shallow Water
Shallow water (roughly under 5 feet) is where a stake-out pole usually beats a traditional anchor. There’s little benefit to a full anchor system when you can push a pole straight into the bottom in seconds.
- Push the pole into a soft bottom near the kayak, then cleat a short line to it or use a dedicated pole holder.
- Approach quietly in shallow water, splashing an anchor overboard can spook fish well before you make a cast.
- If the bottom is hard-packed or rocky, a stake-out pole won’t hold switch to a small grapnel anchor instead.
- You need much less scope in shallow water, since the total depth-plus-freeboard distance is small to begin with.
How to Anchor a Kayak in Deep Water
Deep water changes the math and the effort involved in a few ways:
- You need significantly more anchor rope. At 20 feet of depth, you may need well over 100 feet of line to maintain proper scope see the calculator below.
- Wind has more time to push you off course while the anchor is paying out, so judge your drop point a bit further upwind than you would in shallow water.
- A heavier anchor generally holds better in deep water, since these spots often have looser sediment or more current at depth. Just make sure the weight of the anchor still matches what your kayak can comfortably store and lift.
- Retrieval takes longer expect more anchor rope to coil and a heavier pull when you retrieve your anchor, especially if there’s current at depth.
Hands-free fishing starts with the right pedal drive. See our best fish finders for kayaks to complete your setup.
Wind vs. Current: Why They’re Not the Same Problem
Wind and current don’t act on your kayak the same way, and understanding the difference helps explain why anchoring sometimes feels unpredictable.
- Current pushes against the hull below the waterline. It’s usually steady and directional, and a kayak’s low profile means current often has more influence on movement than wind does in open water.
- Wind pushes against whatever’s above the waterline you, your seat, your gear, the exposed hull. In an unloaded, high-sitting kayak, wind can dominate even in mild conditions.
- The tricky part is when they don’t agree. Wind from one direction and current from another can push your kayak at odds with itself, causing the kayak to swing or sit at an unexpected angle at anchor.
This is one of the more common reasons people are surprised their kayak isn’t holding the position they expected it’s not necessarily the anchor failing, it’s two different forces working against each other.

5 Methods to Anchor a Kayak (Ranked by Situation)
1. Stake-Out Pole Best for Shallow Water
Pros: Fast, silent, no anchor rope to manage, minimal disturbance. Cons: Only works in shallow water with a soft bottom; not viable in rock or deep water.
For water under 5 feet deep with a soft bottom, a stake-out pole is hard to beat. I use this constantly sight-fishing redfish on skinny flats or working bass along emergent weed lines, where a splashing anchor would spook fish before I made a cast.
How to use it: Push the pole firmly into the bottom near your kayak, then cleat a short line from the kayak to the pole, or use a dedicated pole holder mounted on the hull.
2. Grapnel Anchor Most Versatile Type of Anchor
Pros: Works across most bottom types, folds flat for storage, reliable holding power. Cons: Can snag on heavy structure; needs enough scope to set properly.
This is the anchor I recommend as a primary setup for most kayak anglers. This anchor with four folding flukes grips mud, sand, and rock, and the whole thing collapses for easy storage.
How to use it: Attach an appropriate length of anchor rope to the top of the anchor shaft (see the calculator below), lower it slowly rather than dropping it, and let out enough line for a shallow-angle set. A trolley makes this method significantly easier to manage in changing conditions, but it’s not required to use a grapnel anchor safely see the trolley-free section below.
Pro tip: Loosely zip-tie the flukes against the shaft when fishing over rocky structure it reduces the chance of a permanent snag while still allowing the anchor to set.
Dialed in your rigging? Next, make sure you’re anchoring the right way see our kayak anchoring guide.
3. Drift Sock Best for Windy Days
Pros: Great for covering water, reduces spinning in wind, easy to deploy and stow. Cons: Doesn’t hold a fixed spot; effectiveness depends on matching size to conditions.
A drift sock doesn’t stop your kayak it slows it down. I deploy one when I want to work a large flat or a long contour line without a full stop, especially on breezy days when an unweighted kayak spins or drifts too fast to fish effectively.
How to use it: Clip a short line to the drift sock and deploy it off the side (amidships) for a slower, straighter drift, or off the stern for more directional drift. Carry more than one size smaller for light wind, larger for stronger conditions.
4. Anchor Trolley System Move Your Anchor Point from Bow to Stern
Pros: Lets you adjust your anchor point without re-anchoring; useful in shifting wind or current. Cons: Adds installation and moving parts; not a substitute for good anchoring technique on its own.
An anchor trolley isn’t an anchor itself it’s a control system. A continuous loop of line runs from bow to stern through pulleys, with a ring or karabiner you attach your anchor line to. Sliding that anchor trolley karabiner lets you move the anchor trolley to the bow, to the stern, or anywhere along the side of the kayak, without lifting the anchor.
Why it helps: In current, moving the anchor point toward the bow can let your kayak face into the flow, which often reduces the sideways force acting on the hull. In wind, you might move the anchor trolley to the stern to hold a casting angle. Adjusting your kayak to prevent excess swinging is one of the main reasons anglers add a trolley in the first place but it works best combined with good technique (proper scope, checking your drift, watching conditions), not as a stand-alone fix for every situation.
5. Bow/Stern Tie-Off Simple Way to Anchor Your Kayak
Pros: No extra gear or installation required; fine for calm, short stops. Cons: Less adaptable if wind or current shifts; requires more attention to boat orientation.
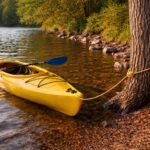
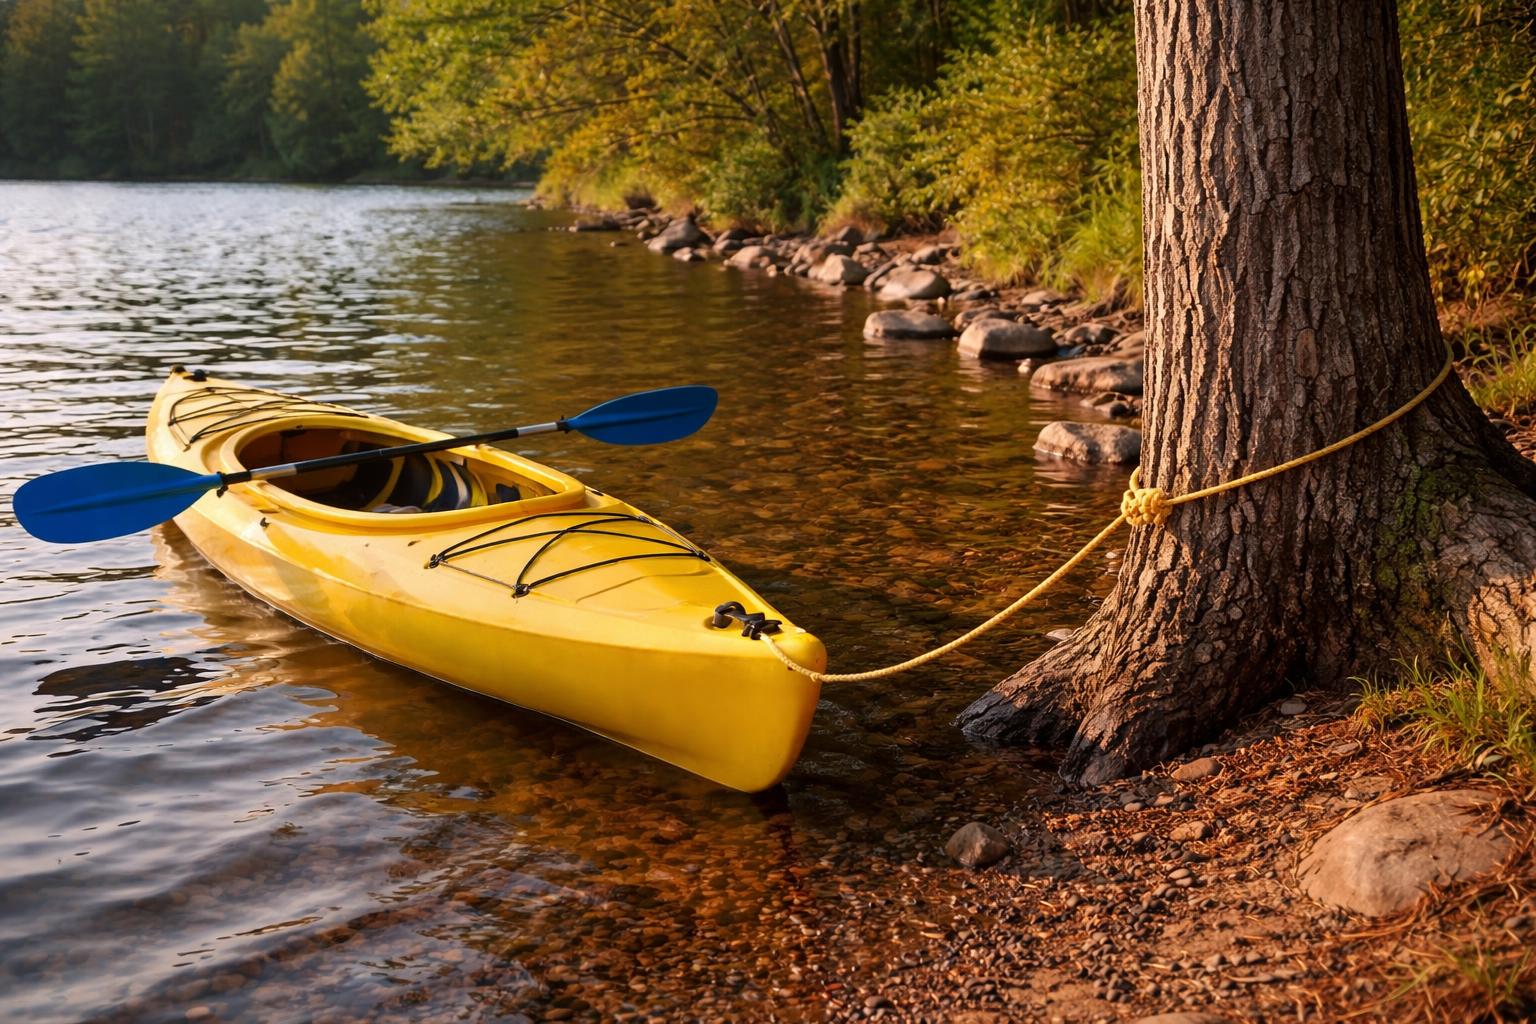
Tying the anchor to the bow or a stern cleat is the most basic way to anchor your kayak, and it works fine in calm water with little to no current or wind.
Why it needs more care in moving water: With a fixed attachment point, the boat’s orientation relative to the current depends entirely on how you initially set your anchor there’s no way to adjust after the fact without repositioning the anchor itself. If the current shifts, or if you didn’t anchor with the boat aligned properly, the current can catch the side of the hull and push it broadside. This isn’t unique to the bow or the stern specifically either end of the kayak can be a problem if the boat ends up sideways to moving water. Use this method with a clear read on conditions, and treat it as your simplest option rather than your most adaptable one.
Know your budget now see which kayaks deliver at that price point in our best kayaks under $500 guide.
Can I Use a Kayak Anchor Without a Trolley?
Yes. A trolley is a convenience upgrade, not a requirement, and you can use a kayak anchor safely without one:
- Anchor from a fixed bow or stern point, but take the extra step of positioning your kayak so it’s already facing into the current or wind before you deploy the anchor rather than dropping it first and hoping the boat settles into a good angle.
- Use a stake-out pole in shallow water, which doesn’t need a trolley at all.
- Use a drift sock when you don’t need a fixed position, sidestepping the orientation problem entirely.
- Check your position more often. Without a trolley, you can’t quickly adjust if conditions shift, so glance at your reference point on shore more frequently than you might with a trolley installed.
A trolley makes life easier, especially in current that shifts throughout a session, but plenty of anglers have known how to anchor a kayak safely for decades without one. Good technique matters more than any single piece of gear.
How Much Anchor Rope Do You Need?
Understanding Scope and the Weight of the Anchor
“Scope” is the ratio of anchor rope length to the total vertical distance the line travels water depth plus the height from the waterline to where the line attaches on your kayak (freeboard). A commonly used starting point is a 7:1 ratio: roughly seven feet of anchor rope for every foot of that combined depth-plus-freeboard measurement.
It’s worth being clear that this is a general guideline, not a fixed rule. Recreational boaters often use a lighter scope (around 5:1) in calm water, and increase it (8:1 to 10:1 or more) in rougher conditions, stronger current, or when they want extra holding margin. The right amount of scope depends on your specific water, wind, and how much margin for error you want 7:1 is simply a reasonable middle-ground starting point for most kayak fishing situations.
The weight of the anchor plays a role too: a heavier anchor generally sets faster and holds more securely, but it also takes up more storage space and is more effort to retrieve. Match the weight of the anchor to your kayak’s size, not the largest option available.
The underlying reason scope matters doesn’t change: an anchor set at a low, shallow angle to the bottom digs in and holds. An anchor pulled at a steep, near-vertical angle which happens when there isn’t enough line out tends to pop loose instead of setting. This is one of the most common reasons an anchor won’t hold, and often has nothing to do with the anchor itself.
Found a kayak you like? See how much gear it can handle in our kayak weight capacity guide.
Anchor Line Length Calculator (Using a 7:1 Ratio)
| Water Depth | + Freeboard (~1–2 ft) | Total | × 7 Scope | Anchor Rope Needed |
|---|---|---|---|---|
| 5 ft | 1 ft | 6 ft | × 7 | ~42 ft |
| 8 ft | 1.5 ft | 9.5 ft | × 7 | ~67 ft |
| 10 ft | 1.5 ft | 11.5 ft | × 7 | ~80 ft |
| 15 ft | 2 ft | 17 ft | × 7 | ~119 ft |
| 20 ft | 2 ft | 22 ft | × 7 | ~154 ft |
How much to actually carry: Match your spool to the deepest water you realistically expect to fish, not just your average depth. If you mostly fish shallow flats and creeks under 10 feet, 75–100 feet of anchor rope covers most situations with room to spare. If you regularly fish deeper water (15–20+ feet), plan for 120–150+ feet so you’re not caught short.
Kayak Anchor Terms Glossary (Quick Reference)
A short glossary of terms you’ll run into whilst at anchor or shopping for gear:
- Anchor point the location on your kayak (bow, stern, or side via a trolley) where the anchor rope attaches.
- Deploy the anchor lowering the anchor overboard and into the water.
- Set the anchor letting the anchor dig into the bottom so it holds rather than drags.
- Retrieve your anchor pulling the anchor back up and onto the kayak once you’re ready to move.
- Release the anchor / cut the anchor line letting go of the anchor rope quickly, usually through a quick-release point, if conditions turn dangerous.
- Anchor and chain a short length of chain sometimes added between the rope and the anchor for extra weight and abrasion resistance over rocky bottom.
- Anchor trolley the pulley system that lets you move the anchor point along the side of the kayak.
- Scope the ratio of anchor rope length to water depth plus freeboard.
- Freeboard the height from the waterline to your kayak’s deck, factored into your scope calculation.
- Anchor overboard the moment the anchor goes into the water, whether intentional or accidental.
Knowing these terms makes it easier to follow instructions (including this guide) and to talk through setups with other anglers or gear retailers.
Common Mistakes When You Deploy the Anchor
- Not letting out enough scope the most common reason an anchor won’t set. If you’re dragging, let out more anchor line before assuming the anchor itself is the problem.
- Dropping the anchor too fast throwing the anchor overboard can cause the flukes to skip across the bottom instead of digging in. Lower it with a controlled hand.
- Using a knot instead of a quick-release point if conditions change fast, a jammed knot costs you critical seconds when you need to release the anchor.
- Anchoring without checking the bottom type first a grapnel over dense weed or a mushroom anchor over rock will both underperform. Match the anchor to the bottom.
- Forgetting to confirm you’re actually holding always check a fixed shoreline point for 30 seconds before assuming the anchor will hold.
- Assuming wind and current are pushing the same direction check both independently, since they often aren’t aligned (see the wind vs. current section above).
Ready to buy? Jump into our beginner kayak picks to find the right one for you.
What Not to Use for Your Kayak Anchor System
- Paracord or non-marine rope as your primary anchor rope it lacks the abrasion resistance and controlled stretch of proper anchor line.
- A heavy boat anchor sized for a powerboat most are unnecessarily bulky and heavy for a kayak’s hull and storage space.
- Tying off to seat straps, handles, or accessory mounts not rated for anchor loads use a proper cleat or anchor trolley ring instead.
- A single fixed knot with no quick-release option regardless of method, always keep a fast way to release the anchor.
- A mushroom anchor as your only anchor if you ever fish current or wind it’s fine as a backup in calm water, but it won’t hold on its own in moving conditions.
Safety: How to Keep Your Kayak From Swinging or Capsizing at Anchor
Anchoring mistakes and safety risk are related but not identical the mistakes above mostly cost you your spot; the ones below can affect your safety.
The core risk is a kayak ending up sideways to moving water while anchored at a single fixed point. When the hull is broadside to current or wind, the force acting on the side of the boat is far greater than when the bow or stern faces into it. This is true whether the fixed point happens to be at the bow or the stern orientation relative to the water matters more than which end of the kayak the line is attached to.
Situations that call for extra caution:
- Anchoring in any noticeable current without first orienting the kayak properly
- Anchoring in chop or waves, where a stern low to the water can take on spray
- Relying on a knot you can’t release quickly if conditions shift
- Anchoring without a clear plan for how you’d release the anchor in an emergency
What actually reduces the risk: orienting your kayak into the wind or current before you set your anchor, keeping your scope correct, using a quick-release point, and checking conditions regularly. An anchor trolley can make these adjustments easier, but it’s one tool among several good judgment and technique matter just as much, and a trolley won’t compensate for anchoring in conditions you shouldn’t be anchoring in at all.
Know your numbers now find a kayak that fits them in our best recreational kayaks roundup.
How to Stop Your Kayak From Swinging at Anchor
A kayak that swings at anchor is usually caused by wind and current pulling in different directions, or by too much slack in the anchor line. A few things that help:
- Reduce scope slightly (within reason) too much slack line can let the kayak swing further before the anchor line goes taut again.
- Move the anchor trolley to the bow or stern, if you have one, to find an angle where the boat settles rather than oscillates.
- Add a second, lighter point of resistance some anglers run a light stern line in addition to the main anchor to dampen swinging, though this adds complexity and isn’t necessary in most conditions.
- Accept a small amount of swing a little movement at anchor is normal and not a sign anything is wrong. It only becomes a problem if it’s pulling you off your spot entirely.
When NOT to Anchor Your Kayak
- Strong current or rapidly worsening weather if conditions are deteriorating, release the anchor and paddle to safety rather than staying anchored.
- Narrow, fast-moving rivers or tidal passes limited space to maneuver combined with strong current is a difficult combination.
- Navigation channels or high-traffic boat areas a stationary kayak is hard for larger vessels to see.
- Directly over snag-prone structure (timber, rock piles) you risk losing your anchor entirely. A stake-out pole or drift sock is often a better option.
- Protected marine areas or sensitive habitats check local regulations before anchoring near reefs, seagrass beds, or marine parks, as anchoring may be restricted.
Alternatives When Anchoring Isn’t the Right Call
- Drift sock slows your drift without a fixed point, letting you fish a stretch of water under control.
- Subtle paddle strokes small, deliberate strokes can hold your position in light current or wind without deploying anything, keeping as much of your kayak as possible facing the right direction.
- Poling off the bottom in shallow water, a paddle or push pole can make fine positional adjustments without a full anchor system.
New to kayaking? Take our quick guide on what size kayak you need before you buy.
How to Retrieve Your Anchor: Pull the Anchor Up Safely
- Paddle up to directly above the anchor this shortens the angle and makes the anchor easier to break free.
- Pull the anchor straight up and down, not at an angle pulling at an angle can re-set the flukes deeper instead of releasing them.
- Coil the anchor rope as you retrieve it to avoid tangles on deck.
- If it won’t budge, stop pulling straight up see the troubleshooting section below before you risk tipping the kayak.
Stuck Anchor? How to Free the Anchor When It’s Snagged
- Paddle to the opposite side of the snag and pull from a different angle this often frees flukes caught on rock or timber.
- Give it slack, then pull sharply a sudden pull can dislodge an anchor that a steady pull won’t.
- Never stand up or lean hard to pull pulling hard on a snagged anchor while off-balance is one of the more avoidable ways to end up in the water.
- If it truly won’t release, let it go a lost anchor is a far better outcome than a capsize in current. This is exactly why a quick-release point matters use it if conditions are pushing you and the anchor gets snagged with no sign of coming free.
Kayak Anchor Buying Checklist: Choosing an Anchor That Fits Your Kayak
- Weight matched to your kayak size heavier isn’t always better; oversized anchors just take up space and add unnecessary weight.
- Folds or collapses for storage critical given a kayak’s limited hatch and deck space.
- Holds in the bottom types you actually fish check the comparison table above before buying.
- Compatible with a trolley system, if you plan to add one later.
- Includes or works with a quick-release point don’t treat this as optional.
- Corrosion-resistant hardware stainless steel or coated components hold up much better in saltwater.
Got your size dialed in now decide between sit-on-top or sit-in with our comparison guide.
Recommended Gear for Your Kayak Anchor System
- Anchor: A 1.5–3 lb folding grapnel anchor covers most kayak fishing conditions and bottom types.
- Anchor trolley kit: Widely available options include kits from brands like YakGear, Anchor Wizard, Hobie (for Hobie kayaks specifically), and Pactrade Marine compare based on your kayak’s mounting points and budget.
- Anchor rope: Enough braided nylon anchor line to cover your deepest realistic fishing depth at a 7:1 scope (see the calculator above).
- Drift sock: Worth carrying in at least two sizes if you fish open, windy water regularly.
(Note: swap in specific product links and pricing here once finalized the brands above are a starting point for research, not a single definitive recommendation.)
Frequently Asked Questions About How to Anchor a Kayak
What size anchor should I use for a 12ft kayak?
A 1.5 to 3-pound folding grapnel anchor is typically enough for a 12ft kayak in most conditions. Go toward the heavier end if you’re regularly fishing current or wind, and lighter if you’re mostly in calm, protected water.
Can you anchor a kayak in a river?
Yes, but current adds risk. Position your kayak facing into the current before you deploy the anchor, whether or not you’re using a trolley, and always keep a quick-release point ready.
What is an anchor trolley system?
It’s a pulley-and-line setup running the length of the kayak that lets you slide your anchor attachment point from the bow of your kayak to the stern of your kayak (or anywhere between) without pulling and re-dropping the anchor. It’s a convenience and control upgrade, not a requirement for anchoring safely.
Can I anchor a kayak without a trolley?
Yes. Many anglers anchor safely using a fixed bow or stern point, as long as they orient the kayak into the current or wind before they set the anchor and check their position regularly afterward.
How do I safely anchor in current?
Approach your spot from upstream, let the anchor set as you drift back, and make sure your kayak is oriented into the current rather than sideways to it with or without a trolley.
When should I use a drift sock instead of an anchor?
Use a drift sock when you want to slow down and cover water like a long flat or contour line rather than hold one fixed spot. It’s also useful on windy days when a stationary anchor system would spin or swing the kayak.
How do I know if my anchor is actually holding?
Pick a fixed point on shore right after you deploy the anchor and watch it for 30 seconds. If you’re slowly moving relative to that point, you’re dragging usually from insufficient scope and need to let out more anchor line or reposition.
Is anchoring from the bow always safer than the stern?
Not necessarily. What matters most is whether the kayak is facing into the current or wind, not which end of the kayak the anchor line is attached to. An anchor at the bow on a kayak sitting sideways to current can be just as risky as a stern anchor in the same position.
What’s the best anchor for kayak fishing overall?
For most anglers, a folding grapnel anchor is the most versatile type of anchor across different bottom types and conditions, with an anchor trolley as a helpful (but optional) add-on for easier repositioning.
How do I stop my anchor rope from tangling in a kayak?
Coil your anchor line neatly every time you retrieve the anchor, and consider a simple line caddy or bucket for storage loose rope in a kayak’s cockpit is one of the most common on-water annoyances.
A Note on Testing and Sources
The methods and recommendations in this guide come from personal, hands-on use across multiple kayaks, water types, and seasons including shallow grass flats, open reservoirs, and moving river current rather than manufacturer claims alone. General paddling safety guidance (PFD use, float plans, and basic river safety practices) draws on publicly available resources from the U.S. Coast Guard and the American Canoe Association, both of which publish broader paddlesports safety education beyond anchoring specifically. If you’re new to paddling in current or open water, their general safety courses are a solid supplement to knowing how to anchor a kayak on your own.
Made your choice? See our beginner kayak guide for top picks in that style.