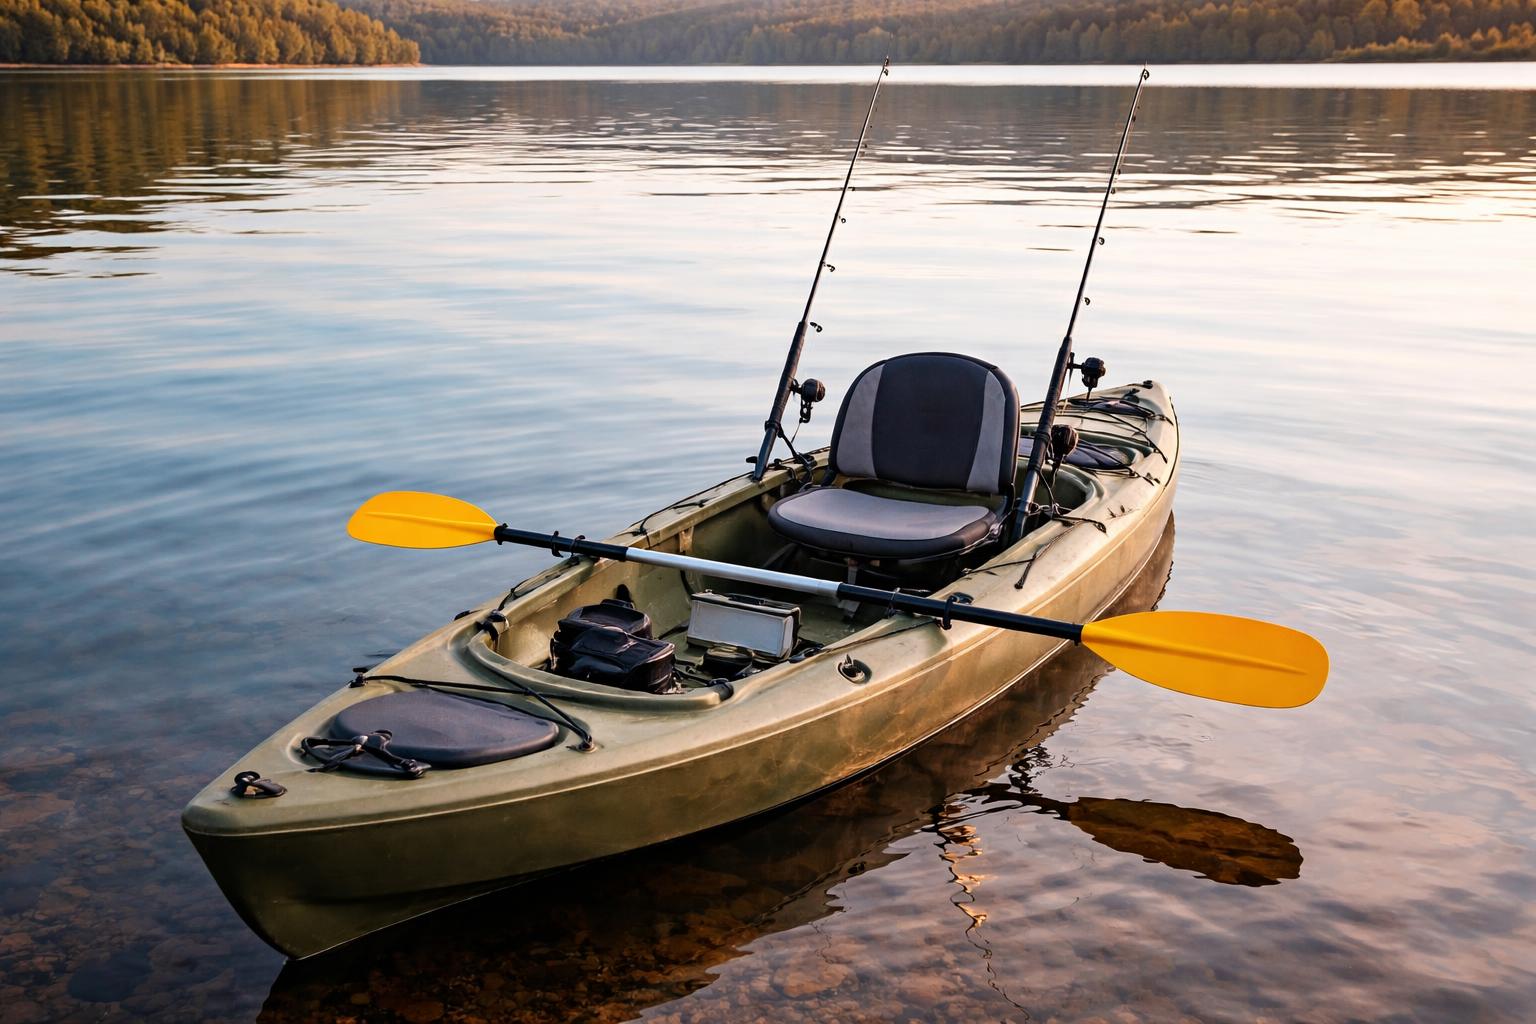
A well-rigged fishing kayak keeps your rods, tackle, electronics, and safety gear secure, organized, and within easy reach without interfering with paddling or stability. Good kayak fishing rigging isn’t about having the most accessories it’s about putting the right gear in the right place while keeping the kayak balanced, uncluttered, and safe.
In this guide, you’ll learn how to rig a fishing kayak from the ground up, including how to choose the right kayak, position rod holders, organize tackle storage, install an anchor trolley, mount a fish finder and transducer, protect your gear from water, and place essential safety equipment. You’ll also learn the common rigging mistakes beginners make and how to build a practical setup without adding unnecessary weight or clutter.
Whether you’re rigging your first fishing kayak or upgrading an existing setup, the goal is simple: create a stable, efficient, and comfortable kayak fishing rig that lets you spend less time managing your equipment and more time fishing.
Quick Answer
Rigging a fishing kayak means adding rod holders, an anchor trolley, a fish finder, and tackle storage in positions that keep your gear secure, accessible, and out of the way while paddling or casting. A basic setup costs $150–$400 and takes a weekend; a fully accessorized rig can run $800–$2,000+ and take several weekends to dial in. Start with safety gear and one rod holder, then build out from there.
At-a-Glance: Kayak Rigging Overview
| Component | Purpose | Typical Cost | Priority |
|---|---|---|---|
| PFD (life jacket) | Non-negotiable safety | $80–$200 | Essential |
| Paddle leash | Prevents loss of paddle | $10–$20 | Essential |
| Rod holder(s) | Secures rods while paddling/trolling | $15–$60 each | Essential |
| Anchor trolley | Boat positioning in wind/current | $30–$80 | High priority |
| Fish finder + transducer | Locates fish and structure | $150–$600 | High priority |
| Tackle crate/storage | Organizes gear, keeps deck clear | $20–$100 | High priority |
| Gear tracks | Flexible, driller-free mounting | $10–$40 per section | Optional |
| VHF radio | Communication in open/saltwater | $100–$250 | Situational |
Essential vs. Optional Gear
Essential don’t launch without these:
- Personal flotation device (PFD), worn at all times
- Paddle with a leash
- At least one rod holder
- Whistle and signaling device
- Basic tackle storage (even a simple dry bag counts to start)
Optional but highly recommended:
- Anchor trolley system
- Fish finder and transducer
- Milk crate or purpose-built tackle crate
- Gear tracks for modular mounting
- VHF radio (situational recommended for saltwater or open water)
- Cooler or livewell setup
Building in this order essential first, optional as budget allows is the single best way to avoid over-rigging a kayak before you know your own fishing style.
Choosing the Right Kayak for Fishing
The foundation of any successful kayak fishing rig begins with selecting the appropriate kayak. This isn’t just about picking any kayak; it’s about understanding how different designs affect stability, rigging flexibility, and your overall experience on the water. A mistake I often see beginners make is prioritizing price over suitability, which leads to premature upgrades once they realize the kayak can’t support the gear they actually need.
Types of Kayaks for Anglers
The primary distinction is between sit-on-top and sit-in models. Sit-on-top fishing kayaks are overwhelmingly preferred by kayak anglers for their stability, easy entry and exit, and expansive deck space for rigging. Sit-in kayaks offer some protection from the elements, but their limited internal space makes them less versatile for extensive customization.
| Kayak Type | Key Features for Fishing |
|---|---|
| Sit-on-top | Inherent stability, easy entry/exit, expansive deck space for rod holders, fish finder, and storage |
| Sit-in | Some protection from elements, but limited space restricts gear tracks and extensive rigging |
How to Assess Stability and Comfort
Stability is paramount for kayak fishing, especially when casting, fighting a fish, or standing to sight-fish in shallow water. When I assess a new kayak, I prioritize a wide hull design, which typically means greater primary and secondary stability. Comfort matters just as much an uncomfortable seat leads to shorter, less enjoyable trips. Before committing, try to “test sit” the kayak, or better yet, paddle it on the water to gauge stability firsthand.
Weight Distribution and On-Water Stability
Once you start adding gear, weight distribution becomes just as important as the kayak’s hull design. I learned this the hard way early on I once mounted a heavy fish finder battery too far forward and the bow sat noticeably lower, making the kayak harder to control in wind.
A few rules I follow on every rig:
- Keep heavy items low and centered batteries, coolers, and crates belong near your seat, not the bow or stern
- Balance side-to-side weight, especially if you’re mounting an anchor trolley or gear track on one side only
- Avoid overloading the bow or stern excess weight at either end reduces maneuverability and increases the chance of taking on water in chop
- Reassess trim after every gear addition even a new rod holder shifts balance slightly
Considerations for Saltwater vs. Freshwater Fishing
The environment you fish most influences your kayak choice. Freshwater anglers might prioritize maneuverability for tighter spots on rivers or smaller lakes. Saltwater anglers need marine-grade hardware throughout the rig to withstand corrosion from current, wind, and open water conditions.
| Environment | Recommended Kayak Features |
|---|---|
| Saltwater | Sit-on-top with strong tracking and flotation; marine-grade hardware throughout |
| Freshwater | Maneuverable hull; standard stainless hardware is generally sufficient |
Step-by-Step Rigging Process
Here’s the order I recommend rigging a fishing kayak in, from a bare hull to a fully functional setup:
- Install your PFD storage and paddle leash first. Safety gear placement should be decided before anything else goes on the deck.
- Mount your primary rod holder(s). Start with one or two flush-mount or rail-mounted holders near your seat.
- Install the anchor trolley. Decide on bow and stern pulley placement, drill pilot holes, and secure pulleys with waterproof marine-grade hardware. Thread a continuous loop of strong line through both pulleys, attach a ring for your anchor line, and add a cleat to lock the trolley in place.
- Add gear tracks along the sides or in front of the seat for modular, driller-free mounting of accessories.
- Mount your fish finder display using a RAM mount or gear-track-compatible mount within clear sightline of your seat.
- Install the transducer, ideally through a scupper hole to avoid additional drilling, and route wiring neatly and waterproof it.
- Secure your tackle crate or storage system behind the seat using bungee cords or a dedicated mounting bracket.
- Do a dry-land test. Sit in the kayak, reach for every piece of gear, and confirm nothing obstructs your paddle stroke or casting motion.
- Test on calm water before a full day trip, and reassess weight distribution and comfort.
A common mistake at this stage is skipping the dry-land and calm-water tests problems that are minor annoyances on land become real hazards once you’re a mile offshore.
Rod Holder Placement
Rod holder placement affects both your casting motion and how efficiently you can troll or grab a rod when a fish strikes. I’ve experimented with several configurations, and what works best depends on fishing style:
- Behind the seat (flush or rail-mounted): Best for trolling and secondary rods you’re not actively using
- Beside the seat, angled slightly outward: Ideal for your primary rod quick to grab, doesn’t interfere with paddling
- Bow-mounted: Useful for a second trolling line but keep it clear of your paddle stroke
- Avoid mounting directly in your paddle’s arc this is the single most common placement mistake I see, and it leads to constant knuckle-knocking and tangled lines
| Rod Holder Type | Key Features & Use |
|---|---|
| Flush mount | Clean, low-profile; ideal for storage or secondary rods; not adjustable |
| Adjustable, rail-mounted (e.g., gear-track compatible) | Precise positioning for trolling or active fishing; recommended as your primary holder |
Fish Finder and Transducer: Comparison
Choosing the right fish finder and mounting method depends on your kayak type, budget, and how serious you are about locating fish versus general navigation.
| Feature | Entry-Level Combo Unit | Mid-Range Unit | Advanced/GPS Unit |
|---|---|---|---|
| Price range | $150–$250 | $300–$500 | $500–$900+ |
| Display | Basic sonar only | Sonar + basic mapping | Sonar + GPS + detailed mapping |
| Transducer mount | Scupper mount (no drilling) | Scupper or through-hull | Through-hull for best accuracy |
| Best for | Casual anglers, freshwater | Regular anglers, mixed water | Serious/tournament anglers |
| Battery needs | Small 12V battery | Small 12V battery | Larger battery, more frequent charging |
In my experience, a scupper-mount transducer is the best starting point for most anglers it avoids drilling and delivers solid readings for the price. Through-hull mounts offer more accurate readings but require more permanent installation and are better suited to anglers who’ve already committed to their kayak long-term.
Tackle Storage and Deck Organization
Efficient tackle storage is crucial for a productive day of kayak fishing. There’s nothing worse than fumbling for the right lure when the bite is hot. I always recommend a kayak crate or purpose-built tackle system that fits securely behind your seat. A popular DIY solution is a milk crate customized with PVC pipe rod holders and secured with bungee cords. For smaller, frequently used items, a waterproof tackle box that fits in your lap or a front hatch works well.
The key principle: keep frequently accessed items within arm’s reach, and make sure everything is secure enough that it won’t end up overboard in a capsize.
Maximizing Storage Space
Beyond crates, gear tracks let you mount rod holders, a fish finder, and accessories without drilling unnecessary holes. Bungee cords are versatile for securing items to the deck or within hatches. I often store my landing net in a flush-mount rod holder or secure it along the side with bungees the goal is keeping the deck clear for casting and paddling while everything essential stays within reach.
Safety Gear Placement
Safety is non-negotiable, and where you place safety equipment can genuinely be the difference in an emergency.
Core safety gear:
- PFD (worn at all times, not just stored)
- Paddle leash
- Whistle and signaling mirror
- Marine-band VHF radio (especially for saltwater or open water)
- A sharp, easily accessible knife for cutting tangled lines or rope
Placement guidance:
- Whistle: clipped to your PFD
- VHF radio: waterproof pouch on your PFD or a console mount directly in front of you
- First-aid or repair kit: clearly marked, waterproof bag in a secure but reachable hatch
Common Mistakes with Safety Gear
A common mistake I see new anglers make is stowing safety gear deep inside the hull, making it inaccessible when it’s needed most. Others neglect to check gear condition regularly a weathered PFD or a radio with dead batteries offers false security. Some anglers also choose an uncomfortable PFD and end up not wearing it consistently. Always choose a comfortable, purpose-built fishing PFD, and treat safety gear checks as part of your pre-launch routine, not an afterthought.
Common Rigging Mistakes
| Mistake | Why It’s a Problem | Fix |
|---|---|---|
| Over-rigging with unnecessary gear | Cluttered deck, unbalanced kayak | Start minimal, add gear as you learn your needs |
| Poor rod holder placement | Interferes with paddling or casting | Test placement on dry land before committing |
| Unwaterproofed electrical connections | Fish finder or lighting failure | Use marine-grade connectors and dielectric grease |
| Skipping marine-grade hardware | Corrosion and failure over time | Always use stainless or marine-rated hardware |
| Ignoring weight distribution | Reduced stability and control | Keep heavy items low and centered |
| Storing safety gear out of reach | Delayed response in emergencies | Keep essentials on your person or within arm’s reach |
Beginner Setup: Where to Start
If you’re new to kayak fishing, resist the urge to rig everything at once. Here’s the minimum viable setup I recommend for a first season:
- A properly fitted PFD, worn every time you’re on the water
- A quality paddle with a leash
- One rod holder positioned beside your seat
- A simple dry bag or small crate for tackle
- A whistle and basic signaling device
From there, add an anchor trolley and fish finder once you’ve spent a few outings learning your own fishing style and the specific spots you fish most.
Buying Checklist
Before you head to the water or the store run through this list:
- [ ] PFD fitted and comfortable enough to wear all day
- [ ] Paddle sized correctly for your height and kayak width
- [ ] Paddle leash attached and tested
- [ ] At least one rod holder installed and positioned out of your paddle stroke
- [ ] Tackle storage secured and accessible
- [ ] Anchor trolley installed (if applicable) with marine-grade hardware
- [ ] Fish finder mounted with waterproofed wiring (if applicable)
- [ ] Safety gear (whistle, knife, first-aid kit) placed within reach
- [ ] Weight distribution checked no excess load at bow or stern
- [ ] Dry-land test completed reach for every piece of gear before launching
Budget Tiers: Building Your Rig
| Tier | Approximate Cost | What’s Included |
|---|---|---|
| Budget | $150–$400 | PFD, paddle + leash, 1–2 rod holders, basic dry bag or crate |
| Mid-Range | $400–$900 | Everything in Budget + anchor trolley, entry-level fish finder, gear tracks |
| Advanced | $900–$2,000+ | Everything in Mid-Range + GPS-enabled fish finder, VHF radio, multiple gear tracks, premium seat, livewell/cooler setup |
There’s no requirement to jump straight to the Advanced tier. Most experienced anglers built their rig gradually, tier by tier, based on what they actually found themselves needing on the water.
Pros and Cons of a Fully Rigged Kayak
Pros:
- Faster access to gear means more time actually fishing
- Better organization reduces lost tackle and tangled lines
- Improved stability and boat control with a properly balanced setup
- Increased safety with well-placed emergency gear
Cons:
- Added weight can slightly reduce maneuverability and speed
- Higher upfront cost if built all at once
- More components mean more maintenance (corrosion checks, wiring, hardware)
- Risk of over-rigging and cluttering the deck if not planned carefully
Trade-Offs in Rigging Choices
Every rigging decision involves trade-offs. Flush-mount rod holders offer a clean, integrated look and work well for storage, but they lack the adjustability of rail-mounted holders. A larger, more comfortable seat adds weight and can slightly raise your center of gravity, affecting stability. When I customize a kayak, I weigh each addition against its cost, weight, and complexity the goal is a setup that matches your fishing style, not one that includes every accessory available.
Frequently Asked Questions
1. What is kayak fishing rigging?
Kayak fishing rigging is the process of adding and positioning fishing accessories such as rod holders, tackle storage, fish finders, and safety gear.
2. What do you need to rig a fishing kayak?
Essential items include a PFD, paddle, paddle leash, rod holder, tackle storage, waterproof storage, and basic safety equipment.
3. How do you rig a fishing kayak for beginners?
Start with essential safety gear, one or two rod holders, simple tackle storage, and a paddle leash. Add accessories as you gain experience.
4. Where should rod holders go on a fishing kayak?
Rod holders should be positioned where you can reach them easily without interfering with paddling, casting, or other equipment.
5. Is an anchor trolley necessary for kayak fishing?
An anchor trolley is not essential for every angler, but it can be very useful for controlling kayak position in wind or current.
6. Do you need a fish finder on a fishing kayak?
No. A fish finder is optional, but it can help anglers locate underwater structure and identify promising fishing areas.
7. How do you organize tackle on a fishing kayak?
Use a secure kayak crate, tackle box, or waterproof storage system and keep frequently used items within easy reach.
8. How do you keep fishing gear dry on a kayak?
Store valuables and sensitive equipment in waterproof dry bags or waterproof containers secured inside hatches or on the deck.
9. How can you prevent a fishing kayak from becoming unstable?
Avoid overloading the kayak, distribute weight evenly, keep heavy equipment low, and avoid unnecessary accessories that raise the center of gravity.
10. What safety gear should every kayak angler carry?
At minimum, wear a properly fitted PFD and carry a paddle leash, whistle, and appropriate emergency equipment for the water and conditions.
Final Checklist and Key Takeaways
Successful kayak rigging comes down to a few core principles:
- Prioritize safety gear it’s non-negotiable
- Keep frequently used items within arm’s reach
- Avoid over-rigging added clutter and weight work against you
- Use marine-grade hardware, especially for saltwater setups
- Test your setup on dry land and calm water before a full day trip
Encouragement for New Kayak Anglers
Rigging your kayak is a journey, not a destination. Don’t feel pressured to have the “perfect” setup right away. Start with the basics a PFD, a reliable paddle with a leash, and one good rod holder. As you gain experience fishing different spots, you’ll naturally discover what works best for your style. Experiment with gear tracks, storage solutions, and a fish finder setup over time. The joy of kayak fishing comes from the process of learning and adapting so embrace the evolution of your rig and enjoy every moment on the water.